
Add a Media Player to a Web Page
This tutorial is broken. Running it gives a black screen.
This section provides instructions on how to host a media player that can stream an asset using the same embedded player used in the Uplynk CMS. However, the same steps may be used to implement a media player that plays back a live channel or a live event.
Software Prerequisites:
- Web server
Knowledge Prerequisites:
- Basic web server administration
- Basic HTML coding
Key Steps
- Verify web server access.
- Link to libraries.
- Play content.
Step 1 - Verify Web Server Access
-
Verify write access to the desired web server by uploading an HTML file.
-
Open a text editor.
-
Save the following code as an HTML file called "player.html":
<!DOCTYPE html> <html> <head> <title>Add a Media Player to a Web Page</title> </head> <body> <p>Hello, World!</p> </body> </html> -
Upload the above HTML file (player.html) to the root folder of the desired web server.
-
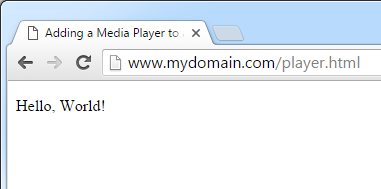
Open a web browser and load the web page (
http://www.example.com/player.html). -
Verify that the web page looks similar to the following illustration:
Step 2 - Add Library Links
-
Add a media player to the web page by adding links to:
- jQuery: jQuery is a popular JavaScript helper library that facilitates common tasks with an API that works across multiple browsers.
- Media Player: This media player is implemented as a jQuery plugin. The script that references this plugin runs after the page loads, ensuring that the player is loaded into the div container.
-
Modify
player.htmlto match the following code:
<!DOCTYPE html>
<html>
  <head>
    <title>Add a Media Player to a Web Page</title>
    <script type="text/javascript" src="https://ajax.googleapis.com/ajax/libs/jquery/1.11.3/jquery.min.js"></script>
    <script type="text/javascript" src="http://storage.uplynk.com/js/swfobject.js"></script>
    <script type="text/javascript" src="http://storage.uplynk.com/js/uplynk.js"></script>
    <style type="text/css">
      html { margin: 0; padding: 0; border: 0; outline: 0; }
      body { background-color: #000; overflow: hidden; }
      #videoPlayer { position: absolute; top: 0; bottom: 0; left: 0; right: 0; }
    </style>
  </head>
  <body>
    <p>Hello, World!</p>
    <div id="videoPlayer"></div>
    <script type="text/javascript">
      $(function(){
        $('#videoPlayer').player('play', 'https://content.uplynk.com/468ba4d137a44f7dab3ad028915d6276.m3u8');
      });
    </script>
  </body>
</html>- From your web browser, refresh player.html. The playback of a video called "Big Buck Bunny" should start.
Step 3 - Play Your Own Content
By default, playback is only allowed when the playback URL has been signed. This security feature prevents playback when a digital signature is not present. For the sake of simplicity during player development, this tutorial disables this security feature on a particular asset. However, it should be re-enabled once the player is ready for the production environment.
See how to sign a playback URL.
-
Disable signature requirement on the desired asset:
- From the CMS, navigate to the Content tab and then select the desired asset.
- Go to the Playback tab.
- Clear the Require a token for playback option.
- Click Save.
-
Copy the playback URL:
- From the CMS, navigate to the Content tab and then select the desired asset.
- Go to the Playback tab.
- Click Copy next to either the HLS or DASH playback URL.
-
Update
player.htmlwith the playback URL:-
Locate the script tag at the bottom of the HTML code in
player.html. -
Replace the playback URL with the desired asset's playback URL (line 12).
<!DOCTYPE html>
<html>
    <head>
    <title>Add a Media Player to a Web Page</title>
    </head>
    <body>
    <p>Hello, World!</p>
    <div id="videoPlayer"></div>
    <script type="text/javascript">
        $(function(){ $('#videoPlayer').player('play', 'https://content.uplynk.com/asset/5fa468149f304cbca25db3f4268c2654.mpd'); });
    </script>
    </body>
</html>
-
-
Save player.html and then upload it to the root folder of your web server.
-
From your web browser, refresh player.html. The playback of the desired asset should start.