
Cloud Slicer Live (CSL)
To create playable content within Uplynk, content needs to be ingested into the system. For live content that Uplynk will encode/package/store/playback, the content must go through the slicing process and then the encoding process. Since the interaction between the slicing and encoding processes are handled automatically within the platform, the user interacts with the Uplynk slicing application. The application is available free of charge to download, configure, and run on the customer's compatible device at a location of the customer's choosing.
Optionally, the customer may leverage Uplynk's Cloud Slicer service. So long as the slicer is paired with an active encode there is no charge. While running but not actively encoding, there is a small Standby fee. The Cloud Slicer Live (CSL) service allows the customer to instance a slicer within the Uplynk cloud environment. This allows you to ingest and encode content without on-premise hardware, thereby eliminating the resources and expertise required to build the environment, download and configure the slicer application, and perform ongoing maintenance, monitoring, and upgrades of the system. It is, however, the customer's responsibility to properly package and get the stream to our platform in a reliable fashion and compatible format. You may customize this slicer in the following ways:
-
Choose a Slicer ID name in an available location that defines where it will be hosted, and the streaming protocol for the audio / video feed that will be ingested.
-
Select the version of the slicer software that it will run.
-
Select the default encoding profile, or a different profile assigned to your account.
-
Define a slicer configuration that determines how the audio / video feed will be ingested and processed.
-
Select a SCTE plug-in if assigned to your account.
The Cloud Slicers Section under the main Ingest tab is home to managing your Cloud Slicers.
From the Cloud Slicers tab, you will be able to:
-
Create, Delete, and Duplicate Cloud Slicers
-
View a list of existing Cloud Slicers in your account
-
View the status of Cloud Slicers in your account
-
Start, Stop, and Restart Cloud slicers
-
View Slicer logs
-
View configuration settings, and parameters needed while setting up sources
-
View Input Stream Health and statistics for certain protocols
-
View Live Preview if available
The general process for using a Cloud Slicer is outlined as follows:
-
Create a Slicer
-
Program the source device/application with the streaming information for the slicer
-
Start the Slicer
-
Initiate the source
-
Confirm that the link is running properly, and that the slicer is slicing the stream
-
View the video within the monitoring tools if desired
-
Add the slicer to a channel, live event, or failover group as the next step to creating your playable outputs
-
At any time, come back to the Cloud Slicer page to see the list of Cloud Slicers and manage them as needed.
-
When the stream will not be active for a while, stop the slicer, and start it again when it is needed (stopping a slicer retains all the configuration parameters, and are used automatically when the slicer is restarted.
-
When finished with a slicer, delete it. Doing so will delete the configuration information and remove it from your slicer list. The deletion process is not reversible.
Quick Start
The Cloud Slicer Live (CSL) platform is very versatile and supports extensive configuration options. Most applications can use default settings, which supports a simple flow that getting started. Set up a streaming workflow by performing the following steps:
-
Select '+ Slicer' at the bottom of the Cloud Slicers main page.
-
Provide a Slicer ID. This is the name that will identify this slicer when it appears in Cloud Slicer views, and within Uplynk as well
-
Select a streaming protocol from the Protocol pull-down selector. This must match the protocol used by the sending device.
Selecting the SRT Protocol option will expose another required selection for Push or Pull mode. The default is Pull mode. Note that once the slicer is created, this mode can not be changed. Modes are defined as follows:
Push Mode - Creates a slicer that will be configured as an SRT listener, where the slicer will wait for a stream to be initiated by a source, and will behave as a receiver of the stream once initiated. The slicer only needs to know that it should listen for SRT packets on it’s IP address/port, and accepts a point-to-point connection initiated by a caller. The slicer will always be the receiver of the SRT media stream itself.
Pull Mode - Creates a slicer that will be configured as an SRT caller, where the slicer will act as the initiator to the SRT session, wait for a stream to be transmitted by the source, and will behave as a receiver of the stream once initiated. The slicer will always be the receiver of the SRT media stream itself. This mode requires a URL for the slicer to find and handshake with the source, which can also be modified in the details screen.
-
Select the region closest to where your stream source will be.
-
Make sure the edit after create option is deselected
-
Click on the Create button
-
This will bring you back to the list view, where you would then click on the slicer you just created.
-
In the single view you will notice that the slicer is in a stopped state. You will also see that it used the latest software version, and the default encoding profile for your account. For more details on those settings see the Cloud Slicer Liver Administration section.
-
On the right panel take note of the Stream URL and Passphrase (for SRT) or Streamkey (RTMP). This information should be copied and needs to be entered in your device that sources the stream. Do not start sending your stream yet, there are still some steps to complete.
-
To start your slicer, click on the green start button on the bottom of the page.
-
You will see Slicer Status on the right panel switch to Initializing. This indicates that the resources are being turned up within the platform, and may take up to several minutes to complete, depending on available resources.
-
When the slicer status indicates Running, it has completed the initialization process and is now ready to accept the stream for slicing.
-
Start your stream at this time, ensuring that you have already entered the URL and phrase/key as directed in step 9 above
-
Check for the status to change, and optionally for Live previews and link monitoring
-
Add your Cloud Slicer to the desired live channel, live event, or failover group.
-
Point Your Player to your live channel or live event's playback URL.
Detailed Slicer Setup
This follows the same flow as the quick start but details out the additional options that are available during the creation process.
Mandatory Steps
-
Select '+ Slicer' at the bottom of the Cloud Slicers main page.
-
Provide a Slicer ID. This is the name that will identify this slicer when it appears in Cloud Slicer views, and within Uplynk as well
-
Select a streaming protocol from the Protocol pull-down selector. This must match the protocol used by the sending device.
Selecting the SRT Protocol option will expose another required selection for Push or Pull mode. The default is Pull mode. Note that once the slicer is created, this mode can not be changed. Modes are defined as follows:
Push Mode - Creates a slicer that will be configured as an SRT listener, where the slicer will wait for a stream to be initiated by a source, and will behave as a receiver of the stream once initiated. The slicer only needs to know that it should listen for SRT packets on it’s IP address/port, and accepts a point-to-point connection initiated by a caller. The slicer will always be the receiver of the SRT media stream itself.
Pull Mode - Creates a slicer that will be configured as an SRT caller, where the slicer will act as the initiator to the SRT session, wait for a stream to be transmitted by the source, and will behave as a receiver of the stream once initiated. The slicer will always be the receiver of the SRT media stream itself. This mode requires a URL for the slicer to find and handshake with the source, which can also be modified in the details screen.
-
Select the region closest to where your stream source will be. This selection can not be changed later
-
Check or Uncheck the 'Edit after Creation' option. If it is deselected, default settings are selected. If checked, default settings are also assigned, but the process will bring you to a screen that allows the user to modify, add, and save new settings
-
Click on the Create button
General Configuration
Slicer ID
This is a property of all slicers in Uplynk, including Cloud Slicers. It can be any string of characters and numbers, but generally customers assign a name that relates to the stream itself to easily distinguish it from other streams that a customer may create within the system. Each SlicerID must be unique within a customer account. It will be the identifier that lets you connect the slicer with a channel, live event, or failover group. It is used to reference your Cloud Slicer within the Cloud Slicing platform. It also is used for the monitoring and analytics systems.
Stream URL [Shown if configuring a slicer initially selected as SRT Push]
When an SRT Push slicer is started, per the SRT specifications, it requires a URL to communicate with to initiate the stream. That URL is generally provided by the source administrators, was required during the initial creation process, and can be modified here. Additional parameters can be added to the URL string such as a stream key or a latency value.
Software Version
Uplynk releases new versions of its slicer application from time to time, supporting new features and making other improvements as needed. It is recommended that the customer always use the latest version. Exceptions would be where the customer has been consistently using a specific release across numerous slicers and wishes to continue using that release for new slicers. Uplynk recommends a customer perform their own testing when upgrading existing slicers to a new release to ensure that there are no issues within their end-to-end offering. Version name reflects the year/month/day and released revision. Clicking on the pulldown will display the available versions that may be used with the platform.
SRT Latency (ms) [Shown if configuring a slicer initially selected as SRT Pull]
This setting is used in the SRT push scenario and contributes to the delay buffer size on the receiver side of the circuit. The delay buffer allows enough time to replace a missing or corrupt packet via a resend message back to the sender. The buffer is intended to accommodate some processing time and the round-trip time of the circuit. International circuits generally would have longer roundtrip times than local circuits and therefore would require higher latency settings. The higher the setting, the longer the delay gets added to the stream.
Latency sensitive applications may need special care to use the proper value. Circuit latency is determined by the higher of the send and receive latency settings. Pull mode can set the latency as a URL parameter. Legacy instances will show a default of 3000ms and can be modified here. New slicers will use 3000 ms as a default and can be modified here as well. See the SRT specification for more information and details relating to the setting of this parameter
Encoding Profile
This specifies the profile that will be used in the encoding of the input stream. It includes the resolutions, bitrates, and frame rays for each ray in the ABR ladder that will be created during the slicing and encoding process. Your account will have access to rate cards aligned with the service order. Each rate card can have a dozen or so profile choices each with unique characteristics. Your account will also have a default Live profile which will automatically populate this selection, and some accounts may have only the default profiles available. Selecting 'change profile' will produce the list of selectable profiles for your account, which may display as few as a single profile, and up to several dozen.
Selecting the 'All Rates pulldown allows the user to select a family of profiles, determined by the highest ray of a profile. For example selecting the HD 720p25/30 rate card shows the profiles that have 720p resolution at 25 to 30 frames per second as their highest encoded ray. Variations such as b-frame support, number of passes, slice size, etc for each profile is listed, as well as the number of VoD assets in your account that were encoded with this profile. Generally speaking, unless there is some specific reason to not use the default profile, it is recommended that the default profile is used. For assistance on selecting a non-default profile, please reach out to your account representative, or call or submit a ticket to the Uplynk Support team.
AutoStart / Autostop
If autostop is enabled and the slicer is running, and a period of time passes with no stream being sent to the running slicer meets the Timeout value set during configuration/enablement, the slicer will automatically stop running. A stopped slicer shuts down the resources that were being used for the slicer. A stopped slicer incurs no charges in the system, and the system reserves and preserves its configurations, profile data, addresses/passkeys, etc. Stopped slicers remain in the CSL slicer list (showing stopped status) and allow for configuration changes during that time. A running slicer can always be stopped manually whether or not autostop is enabled.
If autostart is enabled and the slicer is in a stopped state, and an active stream is seen at the slicer address, the slicer will automatically start running. Note that the slicer has to ‘spin up’ the cloud resources, then build and configure the slicer. This may take several minutes (with the status showing as initializing), during which time the source stream is being ‘handshaked with’ but the data stream itself is not processed. Once established the slicer will sych with the running stream and commence slicing at that time. A stopped slicer can always be started manually whether or not autostart is enabled.
Note that autostart and autostop are enabled independently based on user preference. Also note that manually stopping a running stream that has autostart enabled will stop the slicer, but the autostart will activate several seconds later and commence a re-start of the slicer.
Notes
This allows the user to enter notes about a slicer that will be viewed on this screen every time in this view. Think of this as a place to write a 'note to self' regarding the feed or slicer instance.
Advanced Configuration
Slicers settings are controlled and customized via a configuration file. The file is a set of key and value pairs as defined in the slicer documentation. The CSL platform supplies this configuration file to the slicer on the users behalf, based on certain defaults associated with the cloud slicer platform, plus any specific key and value pairs that the user may wish to add for customization. The key and value pair settings can be set for the slicer via import from a file, manually adding the settings via the UI, or a combination of both. A common practice is to have a common set of customizations in a file, and upload that file each time a new slicer is created, followed by an 'add' for anything additional for that specific slicer.
Certain parameters will require a restart to the slicer to become effective, and some may need additional resources that require a full rebuild of the slicer. During these time periods, any playback associated with this slicer will be negatively affected. We recommend making these changes in off-hours, or leveraging a failover mechanism to a redundant slicer for minimal impact to viewers.
Changes made to the configuration will collectively be stored and displayed, and will persist when switching between views and multiple edits. These stored and persisted customizations will only be applied to the slicer when 'Save Slicer' is selected.
In the Advanced Config section of the single slicer view, the Cloud Slicer Live platform provides a simple method to manage customizations for this slicer. The following activities are supported:
View
When entering the Advanced Config view, a list of custom settings for the slicer will be displayed. By default, a slicer that is created will have no custom settings, so this display will always appear empty, until any needed customizations have been added. Once a customization is added, it will be shown in this display. In the event that the same key is added with multiple values, the last view will take precedence.
Import and Export
Importing allows the user to import a text file containing custom settings key and value pairs. Imported text files use the same format as a live slicer configuration file, specifying each customization on a separate line.
Export will create a simple text file, in config file format, of all current customized configuration settings. This can be saved for simple offline reference. It can also be used as a template file to import on other slicer imports to carry those configuration settings to another slicer.
Add
Selecting the + Add will create the ability to manually add custom settings to the existing settings as viewed on the screen. Entries in the left box reflect the 'key' (effectively the name of the setting) the entry on the right reflects the value desired for that key. After entering the key/value pair, clicking '+ Add' will present another set of entry fields for your next customization. Select 'Save Slicer' when the configuration settings are complete. If this is a running slicer, it will implement the settings, and will possibly disrupt the slicing process while the updates are happening.
Modify or Remove
While a customization is presented on the screen, its value may be changed at any time. Each line displayed offers a - icon at the end. Selecting this will remove the line. Selecting 'Remove All' will remove all customization lines. Selecting a and dragging the bar to the left of the line allows re-ordering of the lines within the configuration. Note that any changes will be stored, but not applied until 'Save Slicer' is selected.
The Cloud Slicer Live platform service manages certain slicer configuration settings. You should not manually assign these reserved settings to your Cloud Slicer:
username | apikey | input | port | ssl_port | api_prt | slicerID | manual_ip | input_addr | no_signal_startup | enable_remote_config | srt_passphrase | hwenc | hwdec | rtmp_url | dynamic_overlay | dynamic_overlay_url | multicast | no_signal_image | no_signal_pad | rtp_backlog_dur | rtp_headers | rtp_readahead_dur
Learn more about live slicer configurations
Plugins
Certain functionality within Uplynk, such as Ad insertion for a live stream, require the customer to signal the ad breaks via API. To assist with this, Uplynk offers a SCTE plug-in module for a slicer that will look for SCTE markers within the source stream. Based upon the information presented in the SCTE marker, the plug-in module can properly interpret and source the API signals that define the ad break, which allows the Uplynk Ad insertion mechanisms to function properly.
There are a variety of ways that information can be conveyed within the inbound SCTE packets, and most customers that leverage this technology work with our services team to customize this logic for their streams. There are also some 'default' plug-ins that may be deployed for a slicer. These Plug-ins, whether defaults or customs, must be uniquely added to the customer's account by the Uplynk team. Reach out to your account team or Uplynk support to enable and/or develop Plugins for usage within your account.
If plugins are enabled for this account, they will be shown in this view. Selecting a plugin and saving the setting will include it for this slicer. This will cause the slicer to restart.
Input Sharing
In traditional slicer operations, the slicer has a virtual 1:1 connection to a customer’s stream source. CSL supplies an IP address and passkey to the source, and that address and passkey will route the single stream from the source singularly to the CSL slicer.
Circumstances arise where a user may wish to connect a single source to multiple slicers. To eliminate the need of the customer creating a second duplicated source and streaming that to the CSL platform, the CSL platform allows a user to link multiple slicers to a single source using the ‘Input Sharing’ feature. Some example use cases are as follows:
- Upgrading to a new Slicer Release, with minimal down-time using failover group
- Creating a second stream of the same source with a different profile for A/B quality testing
- Creating a second asset from the same source with a different profile creating a different asset with different delivery price points (e.g. Audio only)
- Adding a bug/overlay to a stream, while still maintaining a clean copy of the original stream
- Creating multiple language or regional overlays from a single source
The following characteristics relate to Input Sharing:
- Input Sharing between two slicers must happen in the same CSL region
- Input Sharing between two slicers must specify the same input stream type in both configurations (e.g. SRT)
- Multiple secondaries can share the primary stream.
- All shared instances of a stream must link to the original slicer/stream (no secondary to secondary sharing)
- Stopping the original slicer has no effect on other slicers using the shared input
- Any linked slicer other than the original slicer/stream can be deleted without affecting other slicers sharing the same link
If the original slicer/stream is deleted, any slicers sharing that original stream will also be deleted. Note that this delete operation is IRREVERSIBLE.
Link monitoring is only available on the primary slicer and will be viewable whether that slicer is running or in a stopped state. Note that the preview is not available on the primary slicer if it is in a stopped state, and also note that the link stats on secondaries always show no data
Steps to establish input sharing:
Any stream that is not a secondary can serve as a primary. If a Cloud Slicer Live instance has already been created it can be used. If this is a new stream being created for the primary then build the CSL instance as usual.
After selecting the Input Sharing sub tab of the desired primary slicer:
Go to the detailed view of the CSL instance of the slicer whose input will be the primary, and select the ‘Input Sharing’ sub-tab.
Any current secondaries (if any) linked to the shared input from selected slicer will be displayed here for reference.
Select the + Slicer to initiate the process of linking a secondary slicer input to the primary slicer input.
A Create Slicer modal will appear and allows for the following configurations:
Slicer ID – This is the name that the customer wishes to use to identify this new slicer being created
(Note that the Protocol and Region are ‘read only’ fields and take on the values of the primary slicer sharing its input)
Duplicate configurations – This checkbox allows the new slicer to have all the same configuration settings as the primary. These include slicer version, encoding profile, enhanced configurations, and other settings associated with the primary slicer. Note that configurations can be edited post-create and priot to starting the slicer, so customer may elect to select the box and then modify anything sprecific that needs to change. Not checking the box will use default values unless modified post-create.
Edit after creation – This checkbox will navigate directly to the detailed view of the slicer where the user can view make modifications to the configurations. Not selecting will bring the customer to the list view of the slicers sharing the input from the slicer with the primary input.
Select Create to complete the modal view of the new slicer, and either go to the detailed view of the slicer, or view the list of slicers sharing this input, as selected by the ‘edit after creation’ selection
The slicer may be controlled identically to the primary slicer on the feed, and supports modifications, starting, stopping, restarting, and deleting of the slicer. See the ‘Actionable Options’ in the ‘Manage’ section of this guide for details.
Note that the detailed view of the slicer will support the live preview and status of the slicer, but the link monitoring data will on be valid when viewing the detailed view of the primary slicer.
Logs
A running slicer produces logs that are written out to a file within the Cloud slicer environment, Logs are helpful in debugging issues or just giving more insight into what the slicer is seeing on the input side. Infrequent issues that may not impact the stream are also logged in this file. Customers may not access files within the Cloud Slicer Live platform, but this screen provides a mechanism to view and download the content of the log file.
Viewing Window
After selecting 'Logs' from the Cloud Slicer Live single slicer view, the user will see a scrollable window that shows retrieved lines the are the latest content in the log file. The viewable window is set by the browser height and width. The right scroll bar allows the view to go up and down within the retrieved lines and the bottom bar allows left to right scrolling.
Lines
This setting dictates the number of lines that will be retrieved and vieawable in the display window.
Refresh
Selecting refresh will update the display window with the most recent number of lines specified in the lines setting.
Start/Stop
This starts or stops automatic refresh of the logging lines.
Download
This allows the user to save the lines in the display window to a text file. This allows permanent storage and can be easily searched and shared.
Manage
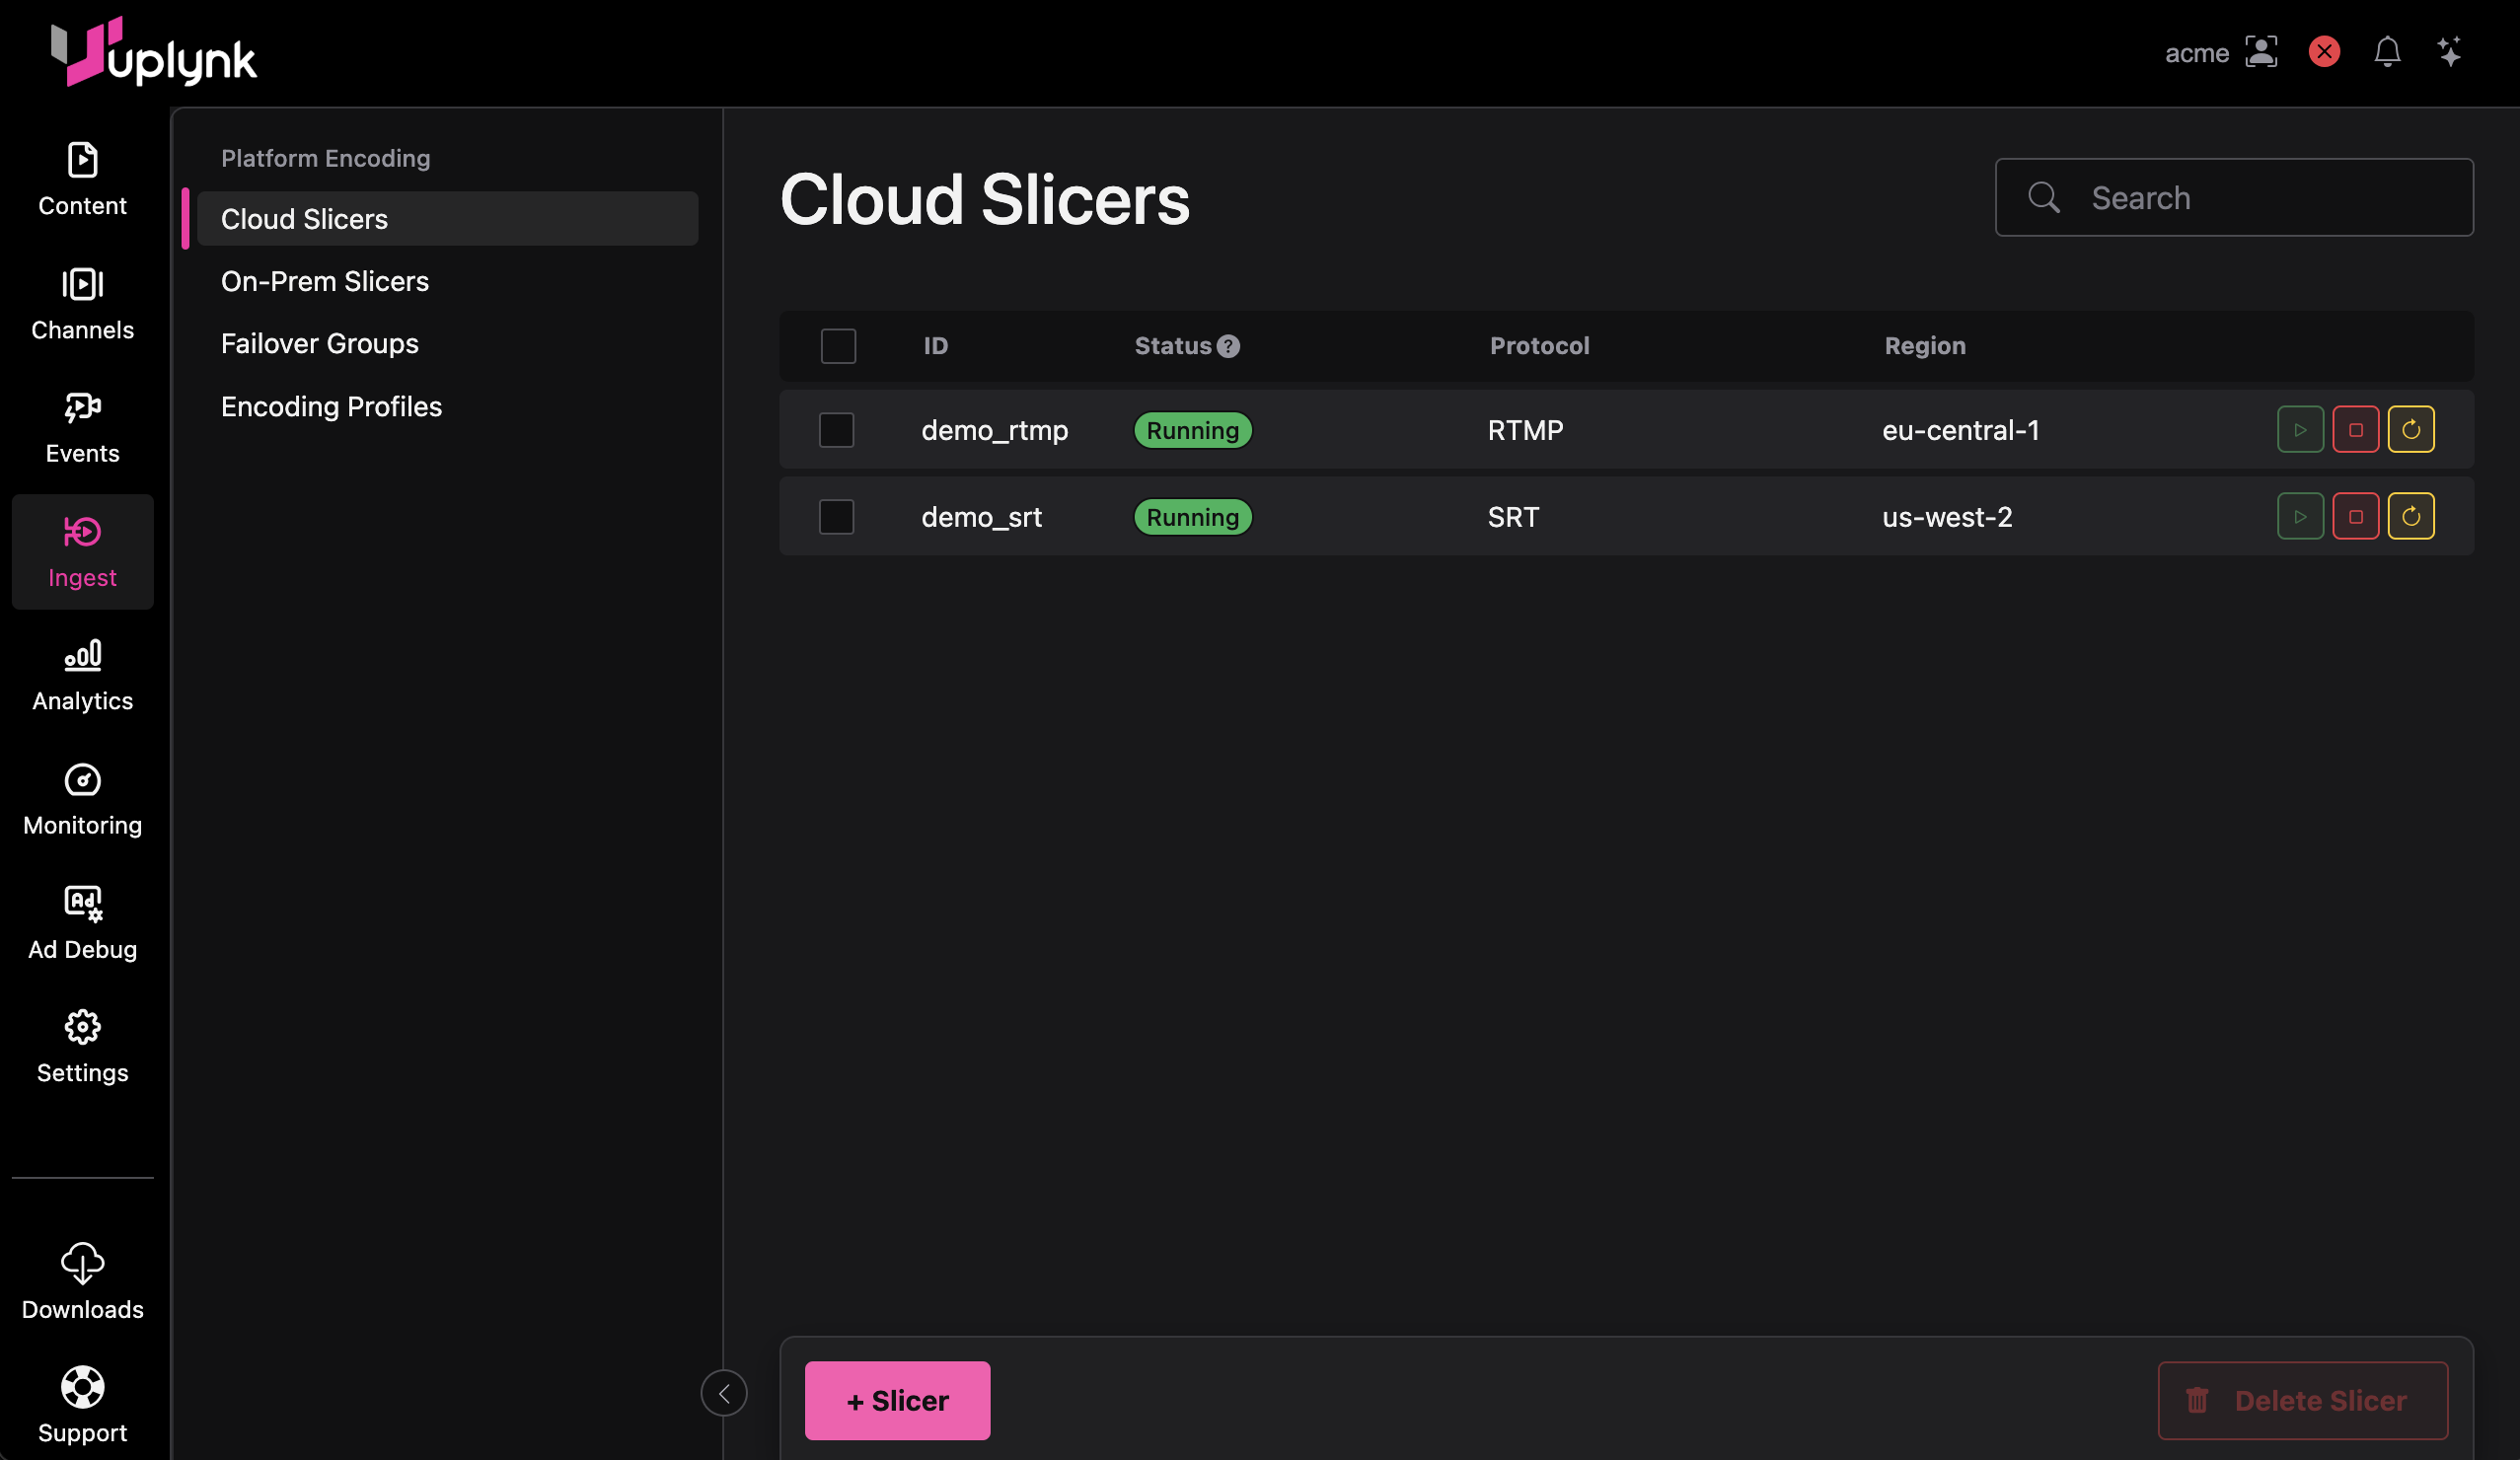
List View
The opening of the ingest -> cloud slicer tab displays a view of the list of Cloud Slicers in the user's account. This gives a single view of some of the characteristics of all these slicers, as well as some quick status and operable commands at your fingertips.
Status Indicators
Along the horizontal bar there are headers, and below are lines associated with each cloud slicer in your account
ID
This is the name of each slicer in the system. This name was provided by the user at the time the slicer was created.
Status
This is a property of the slicer. Values are as follows:
| Status | Description |
|---|---|
| Stopped | Indicates that your Cloud Slicer has been created in the system, but will not be available for use until it is started and running. |
| Initializing | Indicates that our service is in the process of starting your Cloud Slicer so that it can be used to receive a stream. |
| Failed | Indicates that our service could not create your Cloud Slicer. |
| Ready | Indicates that your Cloud Slicer is running and ready for a live feed. |
A Ready Cloud Slicer that is receiving an input feed and processing the stream will change from Ready to one of these slicer states:
| State | Description |
|---|---|
| Capturing | Indicates that your Cloud Slicer is active and sending content to the encoding engine. |
| Replace | Indicates that your Cloud Slicer is active but set to 'replace' state. |
| Ad | Indicates that your Cloud Slicer is active but has been set to reflect an active ad break. |
| Blackout | Indicates that your Cloud Slicer is active but has been set to Blackout mode. |
Protocol
This is the streaming property that was selected during creation.
Region
This is the cloud location that the Cloud Slicer Live platform uses for this slicer.
Highlighted Icons
A highlighted icon indicates that this is a selectable option.
Actionable Options
There are actions that can be taken to affect a slicer listed on this page
Start
This action takes a non-instanced 'stopped' slicer and begins the build process to make it active and usable.
Stop
This action takes a 'running' slicer that is instanced and effectively shuts down the running instance. All information including location, profile, configurations, and addressing remain valid and can be viewed as the properties of the 'stopped' slicer.
Restart
This action forces a restart of a running slicer. This will interrupt the operation of the slicer while it is restarting, and affect the encoding and playback of any output stream using this slicer. On rare occasions the slicer may become locked up due to issues such as errors in the source feed. A reset is a simple way to re-start the application and restore it to a working state.
Delete Slicer
A slicer may be deleted directly from the list view. Select the box at the beginning of the line for one or more slicers listed, and then select the 'Delete Slicer' button on the lower right. Deleting will delete the configuration information and remove it from your slicer list. The deletion process is not reversible.
+ Slicer
Clicking on the '+ Slicer' button will open up a modal. This is your first step in creating a new slicer. Fiels details and the overall process of creating a slicer is summarized in both the Quick Start section and the Detailed Slicer Settings.
Search
This allows the user to find a part of, or the full name, of a cloud slicer in the list. This may be helpful in finding a specific or group of slicers if an account uses a large number of Cloud Slicers.
Single View
Clicking on a slicer in the list view will switch to the single view for the same slicer. This provides more details for the slicer, monitoring capabilities, and more options to manage it.
Actions
Start
This action takes a non-instanced 'stopped' slicer and begins the build process to make it active and usable.
Stop
This action takes a 'running' slicer that is instanced and effectively shuts down the running instance. All information including location, profile, configurations, and addressing remain valid and can be viewed as the properties of the 'stopped' slicer.
Restart
This action forces a restart of a running slicer. This will interrupt the operation of the slicer while it is restarting, and affect the encoding and playback of any output stream using this slicer. On rare occasions the slicer may become locked up due to issues such as errors in the source feed. A reset is a simple way to re-start the application and restore it to a working state.
Duplicate
This action will create an identical slicer with the new name e. Selecting this pops up a modal that will allow for a new SlicerID, and allows the protocol and region to be changed prior to create. All configuration customizations will be cloned as part of this process as well
Monitoring Sidebar - Live Preview
Live Preview Viewer
When a running slicer is capturing a healthy stream, the video will be viewable in this preview window. These previews come from the Uplynk monitoring system and are generally a number of seconds behind the live stream being ingested. No customizations are required to make the stream viewable in this window.
Details of the Slicer
Below the Preview Window are a number of status and health indications.
Slicer Status displays the operational condition (e.g. Running, stopped, initializing, restarting, or error) or when running displays the current slicer activity (e.g. capturing, ad break, replacing content, or blackout)
Input health will be shown as 'healthy' if the connection between the source and the slicer is functioning properly. 'No stream' indicates that the slicer is no longer receiving the stream from the source.
SlicerID is displayed along with a copy icon to assist if needing to enter the ID when configuring a channel, event, or failover group.
API URL shows the URL used to access the slicer directly from a remote system. This uses the slicer API's and is different than the API's that would be used to communicate with the Cloud Slicer platform.
Stream URL and Passkey list the information needed by the source device to send the content stream to this slicer. The copy icons are present in the display. If a streaming device requires the passphrase to be included in the URL, form it as follows:
TheStreamURL?passphrase=ThePassphrase
The other information below those entries consist of information described as part of the create process.
Monitoring Sidebar - Link Monitoring
Link monitoring is available when using the SRT Protocol. Recent improvements in streaming standards have been developed to help improve the reliability of the connection between the source streaming device and the cloud slicer. The protocol with automatically add forward error correction (FEC) packets that can assist in reconstituting small errors in packets. ARQ is also available and allows the cloud slicer a brief window to request missing or errored packets from the source, allowing the cloud slicer to repair the stream prior to the encoding process.
Generally speaking, when the link is healthy, whatever is produced by the streaming source is what is seen by the slicer. Link health is unrelated to any analysis of the video itself.
A stream that does not show any link status usually means that the source is not sending, not sending to the correct URL, not using the correct passkey, no set up with the right protocol, or there is a firewall interfering with the traffic.
Link health is collected for the overall stream during the duration of the link, and also shows the health for the recent interval. Recent Interval health generally reflects the las minute or so of the link. Having both of these available will help in troubleshooting, as well as provide insight over the longer term.
Statistics available are:
| Statistic | Description |
|---|---|
| Stream Bitrate | The bitrate of the stream, usually slightly higher than the video bitrate |
| Packets Inbound | The number of packets received by the Cloud Slicer |
| Percent Link Success | Percent of packets that were sent without error or corrected |
| Packets Errored | The number of bad packets received by the Cloud Slicer |
| Percent Errored | Percentage of packets errored in the overall stream |
| Packets FEC Corrected | The number of packets fixed using Forward Error Correction |
| Percent fixed by FEC | Percentage of packets overall fixed by FEC |
| Packets ARQ Corrected | The number of packets fixed using ARQ |
| Percent Fixed by ARQ | Percentage of packets overall fixed by ARQ |
| ARQ Requests | The number of packets the Cloud Slicer requested to be resent |
| ARQ Fails | The number of packets requested with ARQ that were not successful |
| Percent Failed ARQ | Percentage of packets overall where ARQ was unsuccessful |
| Round Trip Time | An SRT parameter reflecting the measured roundtrip time between the source stream and the cloud slicer |
| Link Uptime | The duration of the link |
| Latency Setting | The Delay to the live stream imposed by the slicer to provide a short window for ARQ to be successful |